
Learning how to test a microphone is crucial for clear communication and quality recordings. This guide provides simple, step-by-step methods, from basic hardware checks and software monitoring to advanced audio analysis. You will learn to identify common issues and optimize your microphone’s performance for any use case, ensuring your voice is heard perfectly every time.
How Do You Test a Microphone?
Ever found yourself in the middle of an important video call, a thrilling gaming session, or even a crucial recording, only to realize your microphone isn’t working as it should? Perhaps your voice sounds muffled, too quiet, or riddled with strange noises. It’s a frustrating experience that many of us have faced. A reliable microphone is the backbone of clear communication, high-quality content creation, and an immersive digital experience. But how do you ensure yours is up to the task? The answer lies in knowing how to test a microphone effectively.
Testing your microphone isn’t just about making sure it picks up sound; it’s about optimizing its performance to capture your voice with clarity, richness, and without unwanted distractions. Whether you’re a professional streamer, a remote worker, a podcaster, or just someone who enjoys chatting with friends online, understanding microphone testing is a vital skill. This comprehensive guide will walk you through everything you need to know, from initial checks to advanced diagnostic techniques, ensuring your voice is always heard loud and clear.
So, let’s dive into the practical steps and expert tips that will empower you to thoroughly test a microphone, troubleshoot common issues, and achieve pristine audio quality. You’ll learn the ins and outs of ensuring your microphone is always ready for prime time, no matter your purpose.
Key Takeaways
- Start with Basics: Always begin your microphone test with physical checks like connections, power, and driver installation to rule out simple issues.
- Utilize Built-in Tools: Your operating system (Windows, macOS) offers excellent sound settings and recording apps for initial microphone testing and monitoring.
- Listen Critically: Pay close attention to clarity, background noise, distortion, and gain levels during your test recordings to diagnose sound quality.
- Optimize Your Environment: The acoustic space significantly impacts microphone performance; test in a quiet, treated environment whenever possible to get the most accurate results.
- Test for Specific Use Cases: Adapt your microphone testing methods to your primary use, whether it’s for gaming, streaming, podcasting, or video conferencing, as each demands different optimizations.
- Troubleshoot Systematically: If issues arise, follow a logical troubleshooting path, checking one component at a time (hardware, software, settings) to pinpoint the problem effectively.
📑 Table of Contents
- The First Steps: Essential Pre-Flight Checks for Your Microphone
- Basic Audio Monitoring: Using Built-in Tools to Test a Microphone
- Deep Dive into Audio Quality: What to Listen For When You Test a Microphone
- Advanced Testing Techniques and Specific Use Cases
- Troubleshooting Common Microphone Issues
- Conclusion: Your Voice, Amplified and Perfected
The First Steps: Essential Pre-Flight Checks for Your Microphone
Before you even think about speaking into your mic, there are a few foundational checks you should always perform. These simple steps often resolve the most common issues and lay the groundwork for a successful microphone test. Think of them as your microphone’s pre-flight checklist.
Physical Connection Verification
The very first thing to check is the physical connection. Is your microphone securely plugged in?
- USB Microphones: Ensure the USB cable is firmly inserted into both the microphone and your computer’s USB port. Try different USB ports, especially direct ports on your motherboard (rear ports on a desktop) rather than a USB hub, which can sometimes have power or compatibility issues.
- XLR Microphones: If you’re using an XLR microphone, make sure the XLR cable is securely connected to both the microphone and your audio interface or mixer. Also, confirm that your audio interface is properly connected to your computer, often via USB.
- 3.5mm Jack Microphones: For microphones with a 3.5mm jack, ensure it’s fully inserted into the correct port on your computer. Usually, this is a pink port for microphones, but some laptops have a combined headset jack. If you’re using a combo jack, you might need an adapter for separate mic and headphone plugs.
A loose connection is a surprisingly common culprit for a non-working mic. Give each connection a gentle wiggle to ensure it’s snug.
Power and Mute Status
This might sound obvious, but it’s easily overlooked!
- Power On: Does your microphone require external power (phantom power for XLR condensers, or a battery)? Ensure it’s switched on and receiving power. For XLR mics, check if phantom power (+48V) is enabled on your audio interface or mixer if your mic requires it.
- Unmute Your Microphone: Many microphones have a physical mute button directly on the device or its cable. Check that it’s not accidentally muted. Similarly, your audio interface or mixer might have a mute switch.
A muted microphone won’t pick up any sound, no matter how loudly you speak!
Driver and Software Checks
Your computer needs the right software to communicate with your microphone.
- Install Drivers: For many USB microphones and all audio interfaces, you’ll need specific drivers installed on your computer. Visit the manufacturer’s website and download the latest drivers for your operating system. Even if it worked before, an OS update might require a driver update.
- Operating System Recognition: Once connected, does your computer even “see” the microphone?
- Windows: Right-click the speaker icon in your system tray, select “Sound Settings,” and then go to “Sound Control Panel” (often found under “Related Settings”). Navigate to the “Recording” tab. Your microphone should appear here. If it’s there, right-click it and select “Set as Default Device.”
- macOS: Go to “System Settings” (or “System Preferences” on older versions), then “Sound,” and select the “Input” tab. Your microphone should be listed here. Select it to make it the active input.
- Sound Settings Input Level: In Windows, navigate to “Sound Settings” (right-click speaker icon -> “Sound Settings”). Under the “Input” section, ensure your microphone is selected. Speak into the microphone, and you should see the “Input volume” bar react, indicating that sound is being picked up. Adjust the input volume (gain) here to a comfortable level – not too low, not too high that it clips (distorts).
- Windows Voice Recorder: For a more thorough listen, use the built-in “Voice Recorder” app. Search for it in the Start Menu. Open the app, click the microphone icon to start recording, speak normally, and then stop the recording. Play it back using headphones to critically listen to your voice. Is it clear? Is there any background noise? Does it sound natural?
- System Settings Input Level: Go to “System Settings” -> “Sound” -> “Input.” Select your microphone from the list. Speak into the mic, and you should see the “Input level” meter react. Adjust the “Input volume” slider until the meter shows a healthy signal without consistently hitting the red (which indicates clipping).
- Voice Memos App: macOS also has a “Voice Memos” application (found in the Applications folder). Open it, click the red record button, speak, and then stop. Play the recording back. Listen for clarity, volume, and any unwanted sounds.
- Browser-Based Testers: Websites like “online-mic-test.com” or “webcammictest.com” allow you to test your microphone directly in your web browser. You grant permission, speak into the mic, and often see a visualizer react to your voice. Some even record a short clip for playback.
- Crispness: Does your voice sound clear and distinct? Can every word be easily understood? Avoid muddiness or muffled sounds.
- Natural Tone: Does your voice sound like *your* voice? Some microphones can alter your vocal tone, making it sound too thin, boomy, or nasal. Aim for a natural representation.
- Proximity Effect: Pay attention to how close you are to the mic. Dynamic microphones, in particular, exhibit a “proximity effect,” where bass frequencies increase as you get closer. Find the sweet spot for your voice and mic.
- Hiss/Static: Listen for a constant, low-level hiss or static. This can be caused by low-quality preamps, too much gain, or electrical interference.
- Hum/Buzz: A steady low-frequency hum (often 50/60Hz) can indicate electrical ground loops or poor shielding. A buzzing sound might be from nearby electronics or faulty cables.
- Environmental Noise: Does the microphone pick up keyboard clicks, mouse movements, air conditioning, or traffic outside? While not always the mic’s fault, it’s crucial to understand what your setup captures. Test in your typical environment and try to minimize these distractions.
- Optimal Gain: Your input volume should be high enough to capture your voice strongly but not so high that it distorts or “clips.” When you speak your loudest, the input level meter should ideally peak in the yellow or orange zone, not consistently red.
- Clipping: Distortion occurs when the audio signal is too strong for the microphone or subsequent equipment to handle, resulting in a harsh, crackling sound. Always aim to avoid clipping. Adjust your microphone’s gain, your audio interface’s preamp level, or your operating system’s input volume downwards if you hear distortion.
- Plosives: These are harsh “P” and “B” sounds that cause a burst of air into the microphone, creating a thumping or popping noise. They are often mitigated by using a pop filter, speaking slightly off-axis, or increasing your distance from the microphone.
- Sibilance: This refers to harsh “S” and “T” sounds that can sound overly sharp or hissy. Some microphones are more prone to sibilance than others. While a de-esser plugin can help in post-production, positioning the mic slightly off-axis can also reduce it.
- Room Reflection: Speak into your microphone and listen for echoes or reverberation. Rooms with hard, reflective surfaces (bare walls, large windows) will often sound “live” or echoey. Adding soft furnishings, carpets, curtains, or acoustic panels can dramatically improve sound quality.
- Background Noise Isolation: Test how well your microphone rejects unwanted background noise. Some microphones, like cardioid patterns, are designed to pick up sound primarily from the front, helping to reduce noise from the sides and rear. Walk around your room and speak to see how the mic behaves.
- A/B Testing: Record the same spoken passage with two different microphones, ensuring all other settings (distance, gain) are as consistent as possible. Listen back to both recordings side-by-side using good quality headphones. Which one sounds clearer? More natural? Which picks up less background noise?
- Benchmark Against a Known Good Mic: If you have a microphone you know sounds good, use it as a reference point. Does your new mic measure up? This helps you understand its strengths and weaknesses.
- Gaming/Streaming: For these scenarios, real-time performance is key. Test your microphone within your gaming or streaming software (e.g., Discord, OBS Studio, Streamlabs OBS). Pay attention to latency, how it sounds with game audio, and if noise suppression features are working correctly. Engage in a live call with a friend to get direct feedback.
- Podcasting/Voiceover: Here, pristine audio quality is paramount. Record longer samples (5-10 minutes) to catch intermittent issues. Focus heavily on clarity, consistent gain, and the absence of any distracting noises that would be amplified during editing. Experiment with mic placement and pop filters.
- Video Conferencing: For apps like Zoom, Microsoft Teams, or Google Meet, test your mic within the application’s audio settings. Ensure your chosen microphone is selected, and use their built-in test features. Pay attention to how noise cancellation features within these apps affect your voice. Sometimes they can make you sound robotic or cut out words.
- Recheck Connections & Power: Go back to basics. Is it plugged in? Is it powered on? Is the phantom power engaged if needed?
- Mute Button: Is there a physical mute button on the mic or cable that’s active?
- Default Device: Is your microphone selected as the default input device in your operating system’s sound settings?
- Application Permissions: Some applications (especially on macOS and Windows 10/11) require explicit permission to access your microphone. Check your privacy settings (e.g., “Microphone privacy settings” on Windows).
- Driver Reinstallation: Uninstall existing drivers and reinstall the latest ones from the manufacturer’s website.
- Try Another Port/Computer: Plug the mic into a different USB port or even another computer to rule out a faulty port or a specific computer issue.
- Adjust Gain/Input Volume: In your OS sound settings or audio interface, lower the input gain if it’s distorting, or raise it if too quiet. Remember, you want to peak in the yellow/orange, not red.
- Software Gain: Check gain settings within your recording software (DAW, OBS) or communication apps (Discord, Zoom). You might have multiple gain stages, and one could be too high or too low.
- Microphone Distance: If too close, you might clip; if too far, you’ll be too quiet and pick up more room noise. Experiment with distance.
- Faulty Cable: A damaged cable can introduce distortion or intermittent signal loss. Try swapping it out if possible.
- Ground Loop: A hum can indicate a ground loop. Try plugging your computer and audio equipment into the same power strip. Ground loop isolators can also help.
- Interference: Keep your microphone cables away from power cables, routers, cell phones, and other electronics that can emit electromagnetic interference.
- Faulty Equipment: A damaged microphone, cable, or audio interface can introduce noise. Systematically test components if you have spares.
- Gain Too High: If your gain is cranked all the way up, even a good mic can produce a slight hiss. Try lowering the gain and speaking closer to the mic.
If your microphone isn’t recognized by your operating system, it’s often a driver or connection issue that needs to be resolved before proceeding.
Basic Audio Monitoring: Using Built-in Tools to Test a Microphone
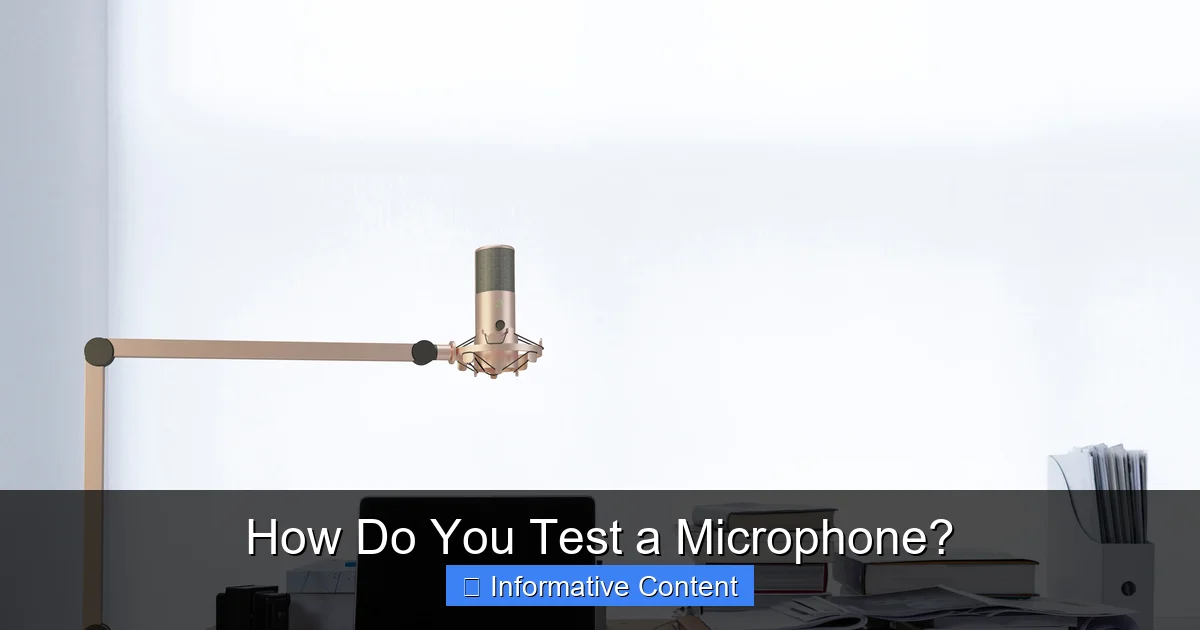
Visual guide about Microphone
Image source: mir-s3-cdn-cf.behance.net
Once the physical and software basics are covered, it’s time to actually listen! Your computer’s operating system provides excellent tools for a quick microphone test.
Windows Sound Settings and Voice Recorder
Windows offers intuitive ways to test your microphone.
This simple recording and playback is often the most effective way to test a microphone initially.
macOS System Settings and Voice Memos
macOS users have similar built-in functionalities.
Both operating systems make it easy to perform a quick microphone check without needing third-party software.
Online Microphone Testing Tools
If you prefer an even quicker method or want to test compatibility with web browsers, several online tools are available.
These are great for verifying if your mic is working with browser-based applications like Zoom, Google Meet, or Discord web.
Deep Dive into Audio Quality: What to Listen For When You Test a Microphone
Beyond simply confirming sound capture, a crucial part of knowing how to test a microphone involves critically evaluating its audio quality. This is where you put on your “audio engineer” hat.
Clarity and Intelligibility
The primary goal of any microphone is to capture your voice clearly.
Background Noise and Interference
A good microphone test isn’t just about what it picks up, but also what it *doesn’t* pick up.
Gain Staging and Distortion
Getting the right volume level (gain) is vital for clean audio.
Plosives and Sibilance
These are common vocal issues that microphones can highlight.
Advanced Testing Techniques and Specific Use Cases
For those who need to test a microphone in more depth or for particular applications, these techniques will help you fine-tune your setup.
Acoustic Environment Testing
The room you’re in plays a huge role in how your microphone sounds.
A great microphone in a bad room will still sound bad. Optimizing your environment is key.
Comparison Testing with Other Microphones
If you have access to multiple microphones, a comparative test can be incredibly insightful.
Testing for Specific Applications
How you test a microphone should reflect how you’ll use it.
Troubleshooting Common Microphone Issues
Even after careful testing, you might run into problems. Knowing how to troubleshoot effectively is an extension of knowing how to test a microphone.
“My Microphone Isn’t Picking Up Any Sound!”
This is the most common and frustrating issue.
“My Microphone Sounds Distorted or Too Quiet/Loud!”
These are usually gain or clipping issues.
“I Hear Buzzing, Hissing, or Static!”
These are often noise issues.
Conclusion: Your Voice, Amplified and Perfected
Learning how to test a microphone effectively is more than just a technical chore; it’s an investment in clear communication and quality audio. By following the steps outlined in this guide – from those initial connection checks to critical listening and advanced troubleshooting – you’ll gain the confidence to ensure your microphone is always performing at its best. No more frustrating calls, muffled recordings, or embarrassing feedback loops.
Remember, the perfect microphone test involves a combination of technical knowledge, attentive listening, and environmental awareness. Take the time to understand your equipment, optimize your settings, and fine-tune your acoustic space. With these practices, your voice will always cut through with clarity, making every interaction, recording, and broadcast a pristine audio experience. So go forth, test your microphone, and let your voice be heard!
🎥 Related Video: How to Test Microphone & Hear voice on Windows 10/11 PC (Fast Tutorial)
📺 YourSixTech
Testing your microphone and hearing your voice on a Windows 10 or Windows 11 PC is essential to ensure everything is working …
Frequently Asked Questions
How often should I test my microphone?
It’s a good practice to test your microphone before every important use, such as a major online meeting, recording session, or live stream. For casual use, a quick test once a week or after any system updates is sufficient to catch potential issues early.
What’s the best way to test a microphone on Windows?
The best way to test a microphone on Windows is by going to “Sound Settings” (right-click speaker icon) and checking the “Input volume” bar to see if it reacts to your voice. For a more thorough test, use the built-in “Voice Recorder” app to make a short recording and play it back with headphones.
Do I need special software to test a microphone?
No, you typically don’t need special software. Your operating system (Windows’ Voice Recorder, macOS’s Voice Memos) provides built-in tools for basic recording and playback. Online microphone test websites are also excellent for quick browser-based checks.
Why does my microphone sound distorted?
Microphone distortion often occurs when the input gain (volume level) is set too high, causing the audio signal to “clip.” Try reducing the gain in your operating system’s sound settings, your audio interface, or your recording software. A faulty cable or microphone can also cause distortion.
How can I reduce background noise during a microphone test?
To reduce background noise, ensure you are in a quiet environment. Position your microphone close to your mouth and away from noise sources. Use a cardioid microphone pattern if available, and consider enabling noise suppression features in your communication software, though be mindful of their impact on voice quality.
What is a pop filter, and do I need one?
A pop filter is a screen placed between your mouth and the microphone. It helps to diffuse air blasts from “plosive” sounds (like ‘p’ and ‘b’) which can cause harsh thumping noises in recordings. If you’re doing voiceover, podcasting, or singing, a pop filter is highly recommended for cleaner audio.