
Building a Do It Yourself Microphone is a rewarding journey for audio enthusiasts and creators alike. It offers incredible cost savings, a deep understanding of audio electronics, and the chance to tailor equipment to your exact needs. From simple electret capsules to more complex designs, the world of DIY microphones is accessible and provides immense satisfaction in creating your own unique sound tool.
Do It Yourself Microphone?
Ever dreamt of recording crystal-clear audio, laying down your next podcast episode, or capturing sweet melodies, but felt daunted by the price tags of professional microphones? What if I told you there’s a thrilling, educational, and often budget-friendly path to achieving fantastic sound quality: building your very own Do It Yourself Microphone? This isn’t just about saving money; it’s about understanding the magic behind sound, unleashing your creativity, and proudly using a piece of equipment you brought to life with your own hands.
The idea of a Do It Yourself Microphone might sound intimidating at first, conjuring images of complex circuits and delicate components. But trust me, it’s more accessible than you think! From simple projects that can be completed in an afternoon to more advanced builds that challenge your electronic skills, there’s a whole spectrum of DIY microphone opportunities waiting for you. Whether you’re a budding podcaster, a musician on a budget, a curious tinkerer, or simply someone who loves to create, diving into the world of DIY audio can be incredibly rewarding.
In this comprehensive guide, we’ll explore everything you need to know about building your own Do It Yourself Microphone. We’ll cover the “why,” the “how,” the “what you need,” and offer practical tips to ensure your project is a success. Get ready to embark on an exciting journey that will not only equip you with a new tool but also deepen your appreciation for the intricate world of sound.
Key Takeaways
- Cost-Effective Creativity: Building a Do It Yourself Microphone can significantly save money compared to purchasing commercial equivalents, especially for specific niche applications.
- Deep Learning Experience: The DIY microphone process provides invaluable insight into electronics, acoustics, and the fundamental principles of sound capture.
- Unleash Customization: Tailor your DIY microphone’s sound profile, aesthetics, and functionality to perfectly match your unique recording needs and personal preferences.
- Start Simple, Grow Confidently: Begin with accessible projects like electret condenser microphones, which are forgiving and offer a strong foundation for more complex builds.
- Essential Tools and Skills: Basic soldering skills, a multimeter, and common electronic components are crucial for most Do It Yourself Microphone projects.
- Safety and Quality are Key: Always prioritize electrical safety, proper shielding, and good component choices to ensure a functional, quiet, and reliable DIY microphone.
📑 Table of Contents
- Why Embark on a Do It Yourself Microphone Project?
- Understanding the Basics: How a Microphone Works
- Getting Started: Essential Components for Your Do It Yourself Microphone
- Step-by-Step Guide: Building a Simple Electret Condenser Microphone
- Advanced Do It Yourself Microphone Projects and Customizations
- Tips for Success and Troubleshooting Your Do It Yourself Microphone
- Conclusion: Your Custom Sound Awaits
Why Embark on a Do It Yourself Microphone Project?
There are compelling reasons why countless audio enthusiasts choose to build their own microphones. It’s not just a niche hobby; it’s a practical and fulfilling endeavor.
Cost Savings That Make a Difference
Let’s face it: high-quality microphones can be expensive. A professional-grade condenser microphone can easily run into hundreds or even thousands of dollars. When you build a Do It Yourself Microphone, you bypass much of the retail markup, labor costs, and branding expenses. You pay for the raw components, which are often surprisingly affordable. This means you can achieve comparable sound quality for a fraction of the price, allowing you to invest your savings elsewhere in your audio setup.
An Invaluable Learning Experience
Building a Do It Yourself Microphone is a fantastic way to learn about electronics, acoustics, and soldering. You’ll gain a practical understanding of how sound waves are converted into electrical signals, the role of different components like resistors and capacitors, and how to properly shield delicate circuits. This hands-on knowledge is incredibly empowering and can demystify the technology you use every day. It’s a skill that extends beyond microphones, opening doors to other DIY electronics projects.
Tailored to Your Specific Needs
Ever wished a microphone had a slightly different frequency response, a unique look, or a specific connector that isn’t standard? When you create a Do It Yourself Microphone, you have complete control over every aspect. You can choose specific capsules, design custom preamplifiers, select unique housing materials, and even experiment with acoustic dampening. This level of customization is simply not possible with off-the-shelf products, allowing you to craft a microphone perfectly suited for your voice, instrument, or recording environment.
The Sheer Joy of Creation
There’s something incredibly satisfying about bringing a project to life with your own hands. The moment you first plug in your homemade Do It Yourself Microphone and hear clear audio coming through, it’s a feeling of accomplishment that mass-produced gear just can’t provide. It’s a testament to your patience, skill, and ingenuity, and every recording you make with it will carry a unique personal touch.
Understanding the Basics: How a Microphone Works
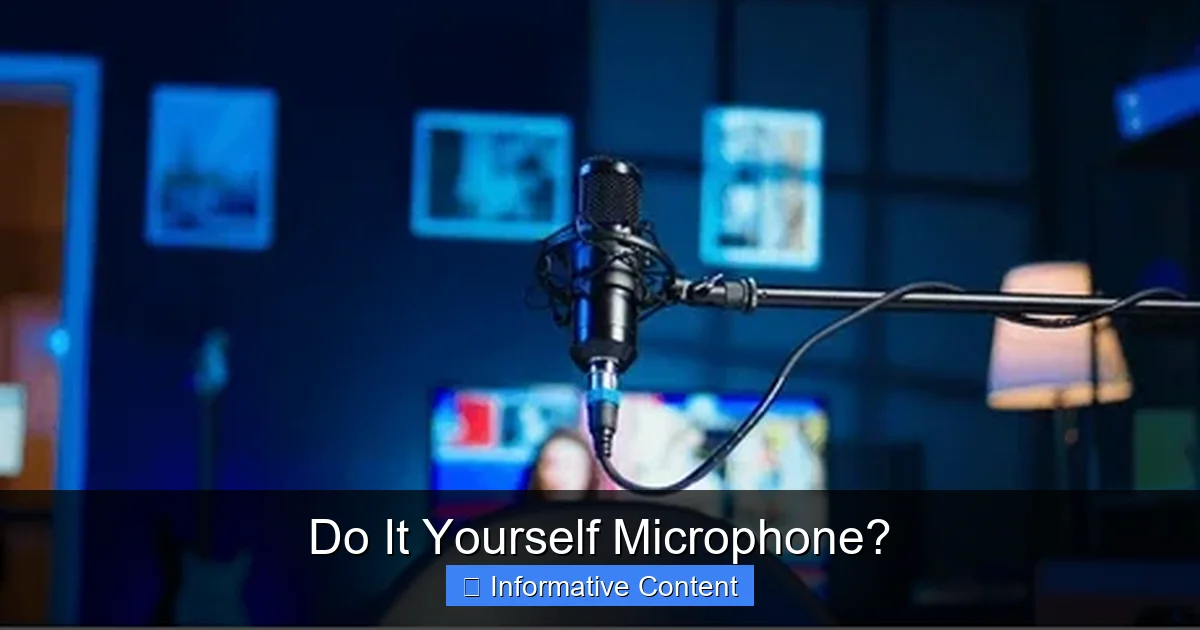
Visual guide about Microphone
Image source: shutterstock.com
Before we dive into building, it’s helpful to understand the fundamental principles of how a microphone captures sound. At its core, a microphone is a “transducer” – a device that converts one form of energy into another. In this case, it changes sound energy (vibrations in the air) into electrical energy.
The Transducer Principle
Most microphones, including the ones easiest to build as a Do It Yourself Microphone, rely on a diaphragm that vibrates when hit by sound waves. This vibration is then converted into an electrical signal through various mechanisms.
Types of Microphones for DIY
While there are many types of microphones, a few are more accessible for DIY builders:
- Dynamic Microphones: These use a coil of wire attached to the diaphragm, which moves within a magnetic field. This movement generates an electrical current. Dynamic mics are robust and don’t require external power, but they can be tricky to build from scratch due to the precision required for the coil and magnet assembly.
- Condenser Microphones (and Electrets): These microphones have a diaphragm and a nearby backplate, forming a capacitor. When sound waves move the diaphragm, the capacitance changes, which in turn creates a voltage change. Condenser mics require power (phantom power from an audio interface or a battery) to charge the capacitor and power an internal amplifier. Electret condenser microphones are a specific type that have a permanently charged material (the electret) built into the diaphragm or backplate, simplifying the power requirements. These are often the easiest and most recommended starting point for a Do It Yourself Microphone project.
Getting Started: Essential Components for Your Do It Yourself Microphone
To build a basic yet functional Do It Yourself Microphone, especially an electret condenser type, you’ll need a few key components and tools. Don’t worry, most of these are readily available online or at electronics stores.
The Heart of the Mic: The Capsule
For beginners, the electret condenser capsule is your best friend. These small, self-contained units include the diaphragm, backplate, and a tiny built-in JFET (junction field-effect transistor) amplifier. They come in various sizes and sensitivities, and they are very affordable. Look for capsules with “omnidirectional” or “cardioid” patterns, depending on your desired sound pickup.
The Supporting Electronics: Resistors and Capacitors
You’ll need a few basic electronic components to create the necessary circuit around your electret capsule.
- Resistors: These limit current and set voltage levels. You’ll typically need one or two for biasing the electret capsule and for the output circuit.
- Capacitors: These store energy and block DC current while allowing AC (audio signal) to pass. You’ll use them for decoupling power and coupling the audio signal.
Connecting the Dots: Wires and Connectors
Good quality wire is crucial for clear audio. Use shielded cable for the output to prevent interference. For connectors, a 3.5mm (1/8 inch) stereo jack is common for connecting to computers or portable recorders, while an XLR connector is standard for professional audio interfaces that provide phantom power.
Powering Your Creation
An electret Do It Yourself Microphone needs a small amount of power.
- Phantom Power: If you’re connecting to an audio interface or mixer with 48V phantom power, your circuit will draw power directly from the XLR cable.
- Battery Power: For simpler setups or if your recording device doesn’t supply phantom power, a small battery (like a AA or 9V) can power your electret capsule via a simple circuit.
The Body: Housing and Enclosure
This is where your creativity can truly shine. The housing protects the internal components and also affects the acoustic properties of the microphone.
- PVC Pipe: An excellent, inexpensive, and easy-to-work-with material for microphone bodies.
- Metal Enclosures: Small project boxes or even old flashlight bodies can be repurposed. Metal provides better shielding against electromagnetic interference.
- 3D Printed Parts: If you have access to a 3D printer, you can design and print custom enclosures perfectly tailored to your components.
Essential Tools for the Job
- Soldering Iron and Solder: Absolutely necessary for connecting components. A fine-tipped iron is best for delicate work.
- Multimeter: Indispensable for checking continuity, voltage, and troubleshooting your circuit.
- Wire Strippers/Cutters: For preparing wires.
- Helping Hands: A stand with alligator clips to hold components while you solder.
- Heat Shrink Tubing: For insulating connections and preventing short circuits.
- Drill and Bits: For creating holes in your enclosure for the capsule and connector.
Step-by-Step Guide: Building a Simple Electret Condenser Microphone
Let’s walk through the basic steps for building a functional Do It Yourself Microphone using an electret capsule. We’ll outline a common circuit that can be powered by either phantom power or a battery.
Step 1: Choose Your Electret Capsule and Circuit Diagram
Start by selecting an electret condenser capsule. For a beginner Do It Yourself Microphone, a common omnidirectional or cardioid capsule (around 6mm to 10mm in diameter) is a good choice. Then, find a simple circuit diagram. Many online resources, hobby electronics sites, and YouTube tutorials provide clear schematics. A typical setup for phantom power involves the capsule, a resistor, and a capacitor, connecting to an XLR jack. For battery power, you’d add a battery holder and a switch.
Step 2: Gather Your Components and Prepare Your Workspace
Lay out all your components and tools. Make sure your soldering iron is heated and your workspace is clean, well-lit, and well-ventilated. Have your wire cutters, strippers, and a multimeter handy.
Step 3: Solder the Basic Circuit
This is the core of your Do It Yourself Microphone.
- Identify Capsule Terminals: Most electret capsules have two terminals: a positive (signal) and a negative (ground). The negative terminal is usually connected to the metal case of the capsule.
- Solder Resistor: Solder a resistor (e.g., 2.2kΩ to 10kΩ, depending on capsule and power) to the positive terminal of the electret capsule.
- Solder Capacitor: Solder a non-polarizing capacitor (e.g., 100nF to 1uF) in series with the resistor, or from the capsule’s signal to the output, to block DC voltage.
- Connect Wires: Connect thin, insulated wires to the appropriate points on your circuit – one for the signal out, and one for ground. Use heat shrink tubing to insulate all exposed solder joints.
- Power Connection (if battery-powered): If you’re using battery power, connect the positive terminal of your battery holder (with an optional switch) to the resistor/capsule circuit, and the negative terminal to the circuit’s ground.
Step 4: Prepare the Enclosure
Take your chosen housing (e.g., PVC pipe).
- Drill Holes: Drill a small hole at one end for the electret capsule to sit just inside, facing outwards. Drill a larger hole at the other end for your connector (XLR or 3.5mm jack).
- Clean and Deburr: Ensure all holes are clean and free of sharp edges to prevent damage to wires.
Step 5: Assemble and Connect to the Connector
Carefully insert your soldered circuit into the housing.
- Mount the Capsule: Secure the electret capsule in its designated hole. You can use a dab of hot glue or a rubber grommet to hold it firmly in place and dampen vibrations.
- Solder to Connector: Connect the signal and ground wires from your circuit to the correct pins on your XLR or 3.5mm jack. For an XLR connector using phantom power, the signal typically goes to pin 2, ground to pin 1, and pin 3 is also usually connected to ground (or wired for balanced output if you’re feeling adventurous). For a 3.5mm stereo jack, tip and ring might be signal and sleeve is ground, or you can wire it mono.
- Secure the Connector: Mount the connector firmly in its hole in the housing.
Step 6: Test Your Do It Yourself Microphone
Plug your newly built Do It Yourself Microphone into your audio interface, mixer, or recording device. Turn on phantom power if needed, or ensure your battery is installed. Speak into the microphone or make a sound. If all goes well, you should hear a clear signal! If not, don’t worry – troubleshooting is part of the fun.
Advanced Do It Yourself Microphone Projects and Customizations
Once you’ve mastered a basic electret Do It Yourself Microphone, you might feel ready for more advanced challenges. The world of DIY audio is vast and exciting!
Modifying Existing Microphones
A great next step is to modify existing inexpensive microphones. This could involve replacing the capsule with a higher-quality one, upgrading internal components like capacitors, or even re-housing the internals in a more robust or acoustically pleasing enclosure. Many popular “mod” kits are available for common budget microphones.
Building Large-Diaphragm Condensers
This is a significant leap in complexity but incredibly rewarding. It involves sourcing high-quality large-diaphragm capsules, designing or purchasing a more complex preamplifier circuit (often tube-based for a classic sound), and crafting a precision-machined body. These projects can rival the sound of boutique microphones. Building a large-diaphragm Do It Yourself Microphone teaches you a lot about impedance matching, noise reduction, and high-voltage electronics.
Ribbon Microphones (Advanced and Potentially Hazardous)
Ribbon microphones are revered for their warm, natural sound. Building one from scratch involves suspending a very thin, corrugated aluminum ribbon in a strong magnetic field. While fascinating, handling the delicate ribbon and working with powerful magnets requires significant skill and safety precautions. This is generally not recommended for beginners.
Preamp Design and Power Supplies
Beyond the microphone itself, you can also dive into building external preamplifiers or custom phantom power supplies to pair with your Do It Yourself Microphone. This allows even greater control over the sound character and signal integrity.
Tips for Success and Troubleshooting Your Do It Yourself Microphone
Building a Do It Yourself Microphone is a journey, and like any journey, there might be a few bumps along the way. Here are some tips to help ensure success and smooth out any rough patches.
Prioritize Safety First
You’ll be working with soldering irons, potentially mains voltage (if building a power supply), and sharp tools. Always wear safety glasses. Ensure good ventilation when soldering. Double-check wiring before applying power to prevent short circuits or component damage. When working with phantom power, remember it’s 48 volts, so treat it with respect.
Start Simple, Master the Basics
Don’t jump into building a complex large-diaphragm condenser for your first Do It Yourself Microphone. Begin with an electret capsule project. It’s forgiving, less expensive, and will teach you fundamental soldering and circuit construction skills. Success with simple projects builds confidence for more ambitious endeavors.
Test as You Go Along
Instead of waiting until the very end to test your Do It Yourself Microphone, test components and circuit sections as you build. Use your multimeter to check for continuity, proper voltage at specific points, and ensure there are no short circuits. This makes troubleshooting much easier if something isn’t working.
Focus on Shielding and Grounding
Noise and hum are common issues with DIY audio electronics. Proper shielding (using metal enclosures, shielded cable) and careful grounding techniques (ensuring all grounds are connected to a common point, avoiding ground loops) are crucial for a quiet Do It Yourself Microphone. Keep signal wires as short as possible and away from power wires.
Patience and Persistence Are Your Friends
Electronics can be finicky. If your Do It Yourself Microphone isn’t working right away, don’t get discouraged. Take a break, double-check your wiring against the schematic, inspect your solder joints for cold joints or bridges, and methodically troubleshoot. There are many online forums and communities where you can ask for help and share your progress.
Document Your Process
Take photos, draw diagrams, and make notes of your wiring, component values, and any modifications you make. This will be incredibly helpful for troubleshooting, recreating the project, or building another Do It Yourself Microphone in the future.
Conclusion: Your Custom Sound Awaits
The world of audio recording can be an expensive one, but building a Do It Yourself Microphone offers a powerful alternative. It’s an opportunity to save money, gain invaluable knowledge, customize your gear to perfection, and experience the immense satisfaction of creating something truly your own. From simple electret builds that get you started quickly to complex, high-performance projects, the journey of building a Do It Yourself Microphone is as rewarding as the incredible sounds you’ll capture with it.
So, are you ready to pick up that soldering iron and bring your own unique sound tool to life? The journey into Do It Yourself Microphone creation is a fascinating one, promising not just a new piece of equipment, but a deeper connection to the very essence of sound. Happy building, and happy recording!
🎥 Related Video: Building a quality USB-C microphone
📺 DIY Perks
Quality audio for cheap? Sounds good to me! Also, don’t forget you can get one free share valued up to £200 by creating a …
Frequently Asked Questions
What is the easiest type of Do It Yourself Microphone to build for beginners?
For beginners, the electret condenser microphone is by far the easiest to build. These capsules are small, inexpensive, and contain most of the necessary components, requiring only a few external resistors and capacitors to get working.
What tools are essential for building a Do It Yourself Microphone?
You’ll definitely need a soldering iron and solder, wire strippers/cutters, and a multimeter for testing. A drill for creating holes in your enclosure and “helping hands” to hold components are also highly recommended for a smoother build process.
Can a Do It Yourself Microphone achieve professional sound quality?
Absolutely! While simpler DIY microphones might not rival top-tier studio mics, carefully chosen components, good construction techniques, and proper shielding can lead to a Do It Yourself Microphone that delivers excellent, professional-level sound quality, often at a fraction of the cost.
Do I need an electronics background to build a DIY microphone?
Not necessarily! While a basic understanding helps, many simple Do It Yourself Microphone projects come with clear, step-by-step instructions and diagrams that even complete beginners can follow. It’s a fantastic way to learn about electronics from the ground up.
How do I power a Do It Yourself Microphone?
Most Do It Yourself Microphone projects, especially those using electret capsules, require a small power source. This can be either phantom power (48V) supplied by an audio interface or mixer via an XLR cable, or a small battery (like a AA or 9V) integrated into the microphone circuit itself.
What are the benefits of building my own microphone compared to buying one?
Building a Do It Yourself Microphone offers significant cost savings, provides a valuable learning experience in electronics, and allows for complete customization to perfectly match your specific audio needs and aesthetic preferences. It also offers the unique satisfaction of creating your own gear.